
A friendly beginner’s guide to change themes, structuring the content with HTML, using Custom CSS, and Installing Google Analytics
Are you looking for a beginner-friendly guide to personalize your WordPress Webpage?
This post will show you step-by-step how to make basic changes in your WordPress website. Wether youa re just starting or want to explore more a basic technical side, this is the right place to start!
Here you will learn:
- How to change a theme
- Use simple HTML Tags
- Add customs CSS
- Connect your website to Google Analytics to track your visitors
Let’s start our journey!
1. Change the WordPress theme on the website
Once you have set up your WordPress account and domain, you can start by personalizing your website by selecting a theme. But how do you do it?
In the WordPress Dashboard, on the left side of the screen you’ll have the menu bar:
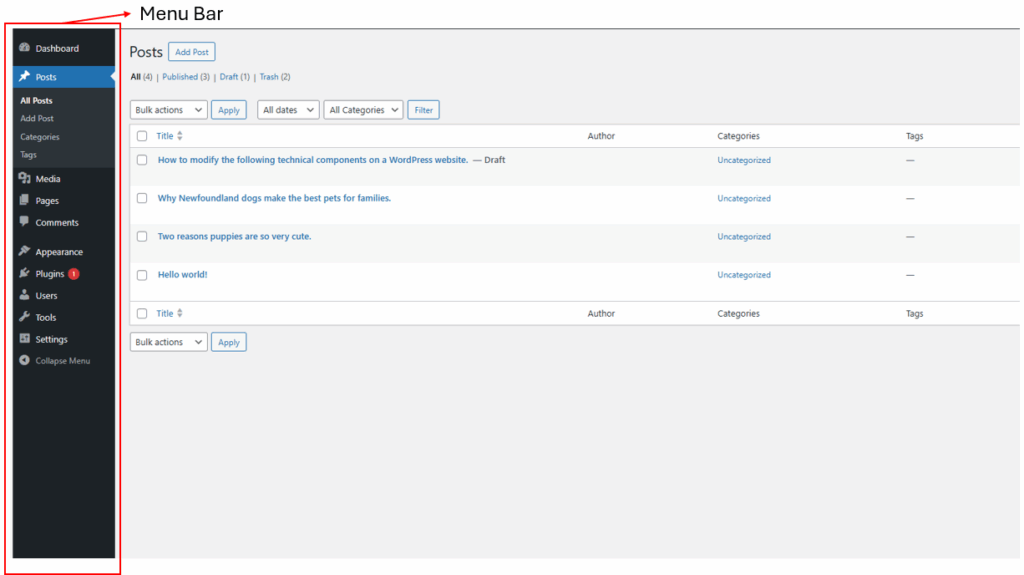
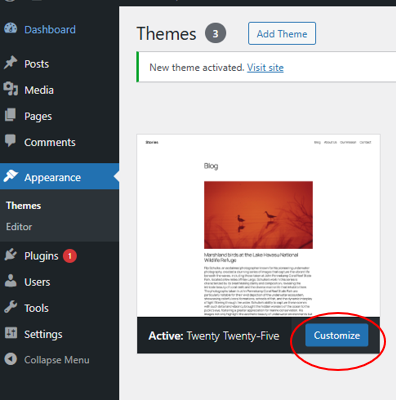
You should click on appearance and then Themes option, as shown in the following image:

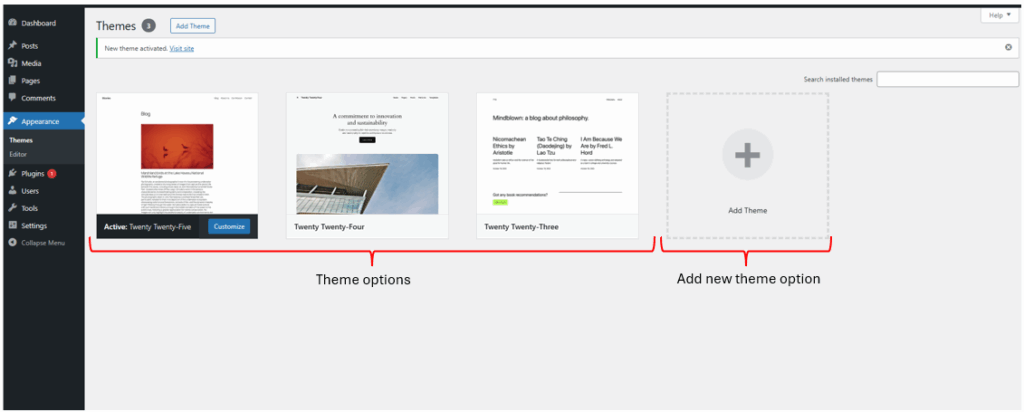
Once clicked, it will display the options you have for the themes, and you can select one. Also, if you have a theme already, you could upload it with the “Add Theme” button, there it will display a list of paid and unpaid themes you can choose from, or if you already have a theme, you can upload it in a .zip format.
If you want to review the detail of an theme you can just click on Theme Details. This will show you a preview of how the theme looks like and how it will look in your site. If you want to select that theme, just click on Activate button.
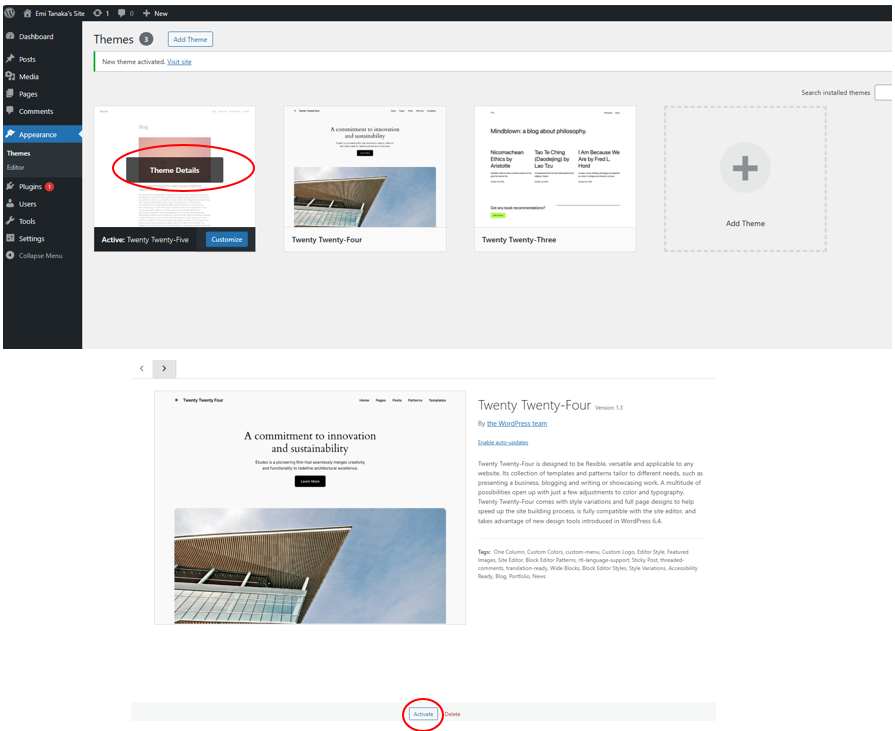
Finally, if you want to customize the theme, you just need to press the Customize button. This will allow you to start using the theme and edit it as you want.
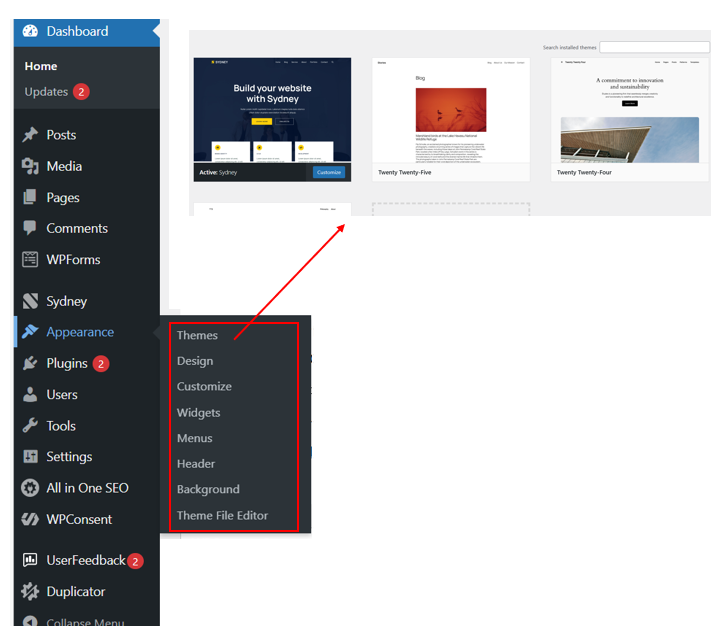
If you go back to Appearance in the Dashboard, you will have all the options for start personalizing your website. And if you want to change of theme this is the right path, you just need to click the Theme button and again select the new theme you want to apply and follow the previous process again.
2. Use of HTML tags to define content on a blog post
HTML or Hypertext Markup Language is the language used to structured content on a website. Is like the instructions that the webpage follows to structure the webpage so it can know what the titles and subtitles are, the paragraph, list, etc. This language is made up of tags that are small pieces of code that help the browser understand the hierarchy and how to display the information.
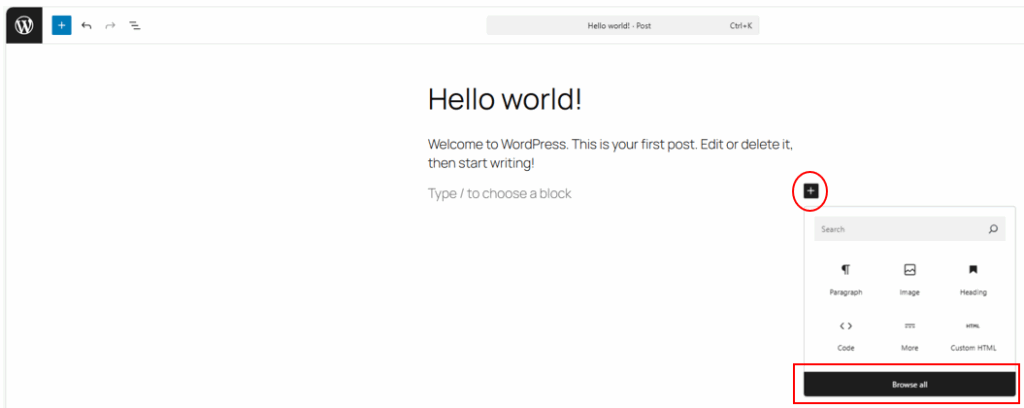
To insert a HTML Code, you should click in the + button that each block at the end have to add a new block. It will display a small window with options, and you should press Browse all.
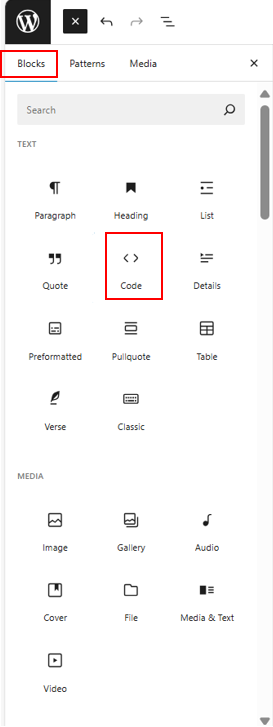
Next, you should look for the option <> that is name Code in the “Blocks” menu
There, a Box will pop and there you can write the HTML code.
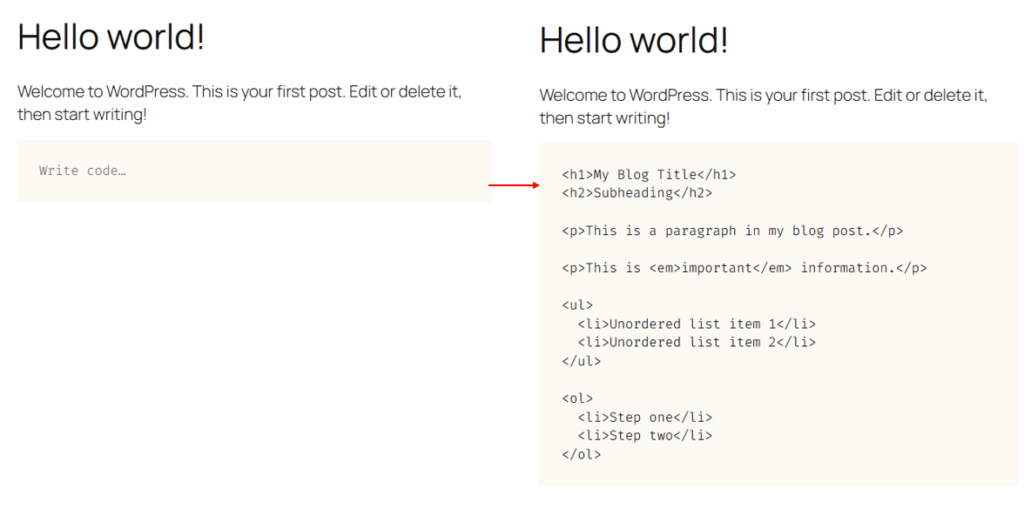
Breaking the code down in a code block:
This is the HTML code for heading. H1 refers to the main heading and h2 is a subheading.
<h1>My Blog Title</h1>
<h2>Subheading</h2>
For indicating the browser you are going to insert a paragraph, use the following tag <p>. The <em> means you are highlighting a word, and it will be in italic.
<p>This is a paragraph in my blog post.</p>
<p>This is <em>important</em> information.</p>
The following code is use for unordered list:
<ul>
  <li>Unordered list item 1</li>
  <li>Unordered list item 2</li>
</ul>
And for order lists (1,2,3,4…), we use the following code:
<ol>
<li>Step one</li>
<li>Step two</li>
</ol>
Please consider following main tags that serve as specific codes:
<h1> Use mostly for main titles
<h2> or <h3> Subheadings or subtitles
<p> For starting a paragraph that is composed by text
<em> Gives content emphasis in italic style
<ul> Is an unordered list (using bullets)
<ol> Is an ordered list (using numbers)
<Strong> Gives content emphasis in bold style
As an important note, the tags always come in pairs; The opening tag (Shown above) and the closing tag for letting the browser know when to stop a title to a bold letter or a paragraph, this tag include a forward slash \. For example, <p> is for starting a paragraph, when ending it the tag would be <\p>
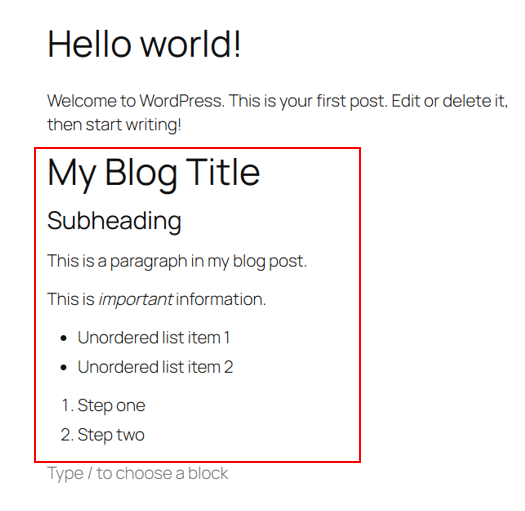
The previous HTML, could be translated to this:
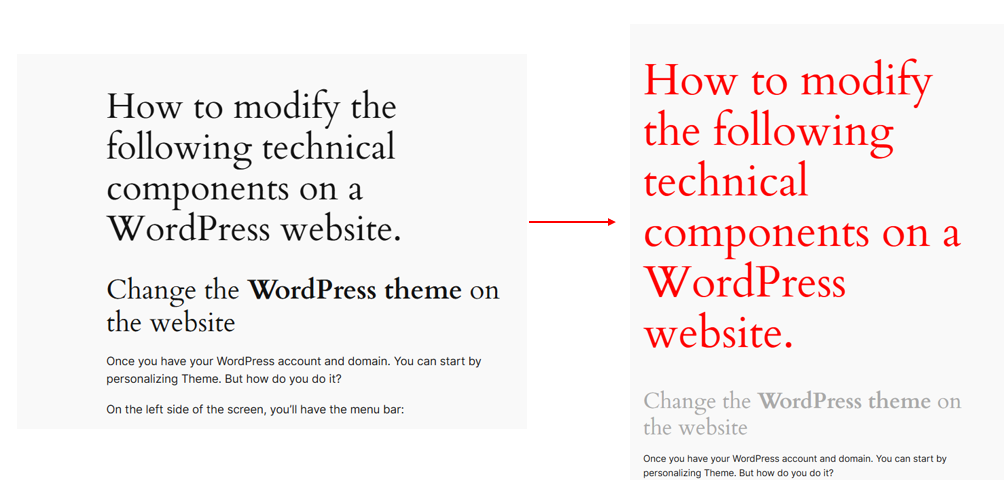
3. Use of Custom CSS
CSS or Cascading Style Sheet is usually the type of language use to control the look, feel and layout of the content. This include but it’s not limited to: Colour, typeface, font size.
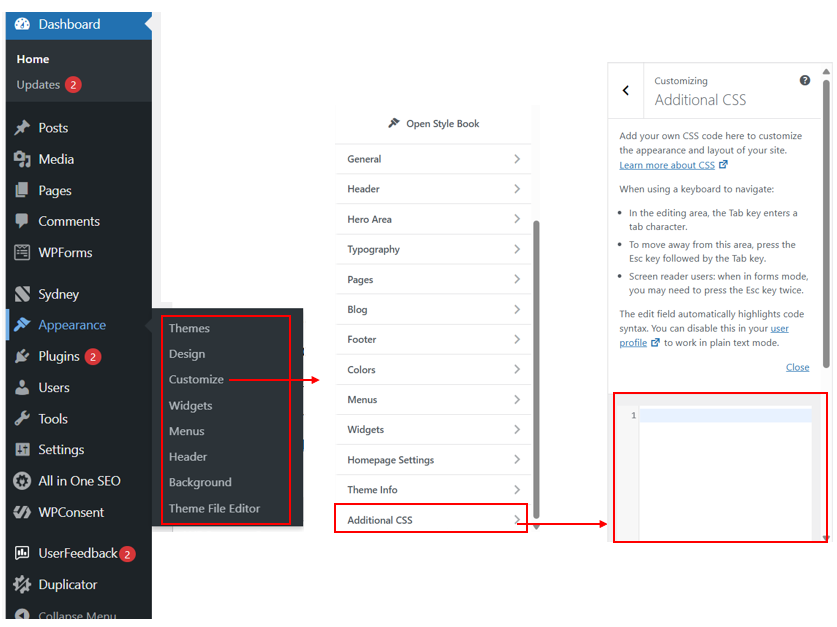
For adjusting this you should go to the dashboard, click on appearance option and then Customize>Additional CSS and that will show a Box where you can type.
That will open a box where you would have to input the instruction on what you need. Remember that CSS is for the Styles and appearance while HTML builds the structure.
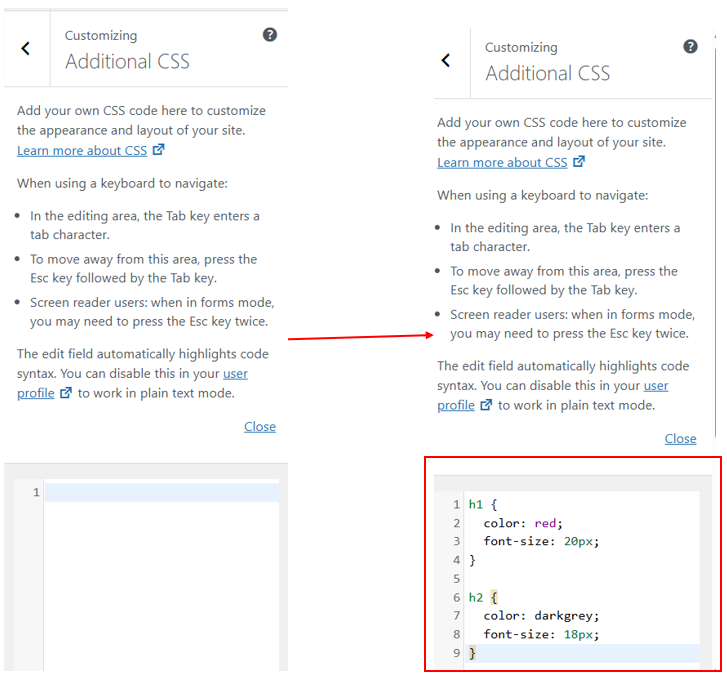
This is the code in a code block:
h1 {
  color: red;
  font-size: 20px;
}

h2 {
  color: darkgrey;
  font-size: 18px;
}
That instruction is what we ask the browser to change or website. The change is showed in the following image:
4. How to install Google Analytics in WordPress
As a final part, Google Analytics can helps track how people use your website. You can check how many visits you have, the pages they view, many important metrics relevant to understand the performance of your webpage. This post will teach you how to install it using a plugin in WordPress called MonsterInsight that is friendly-user making the process very easy without the need of coding.
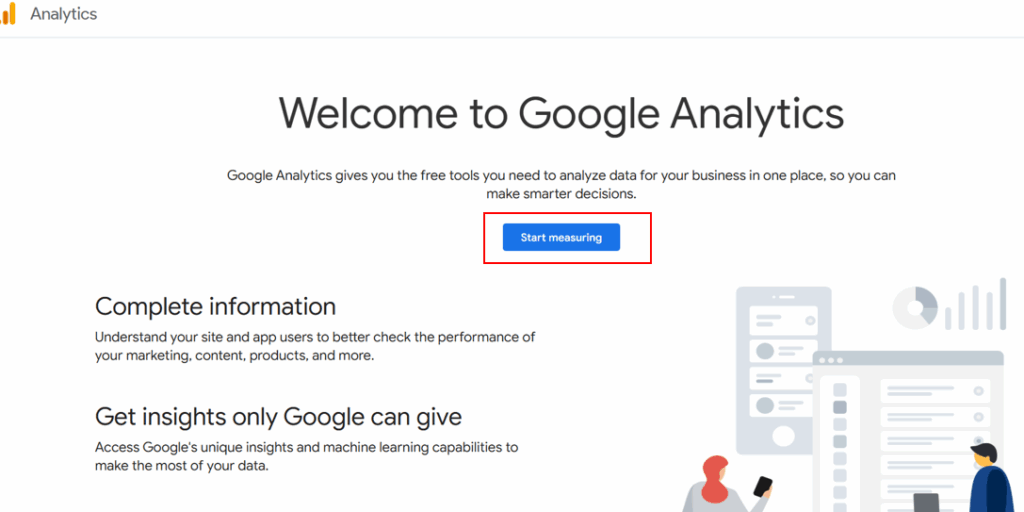
1. First you need to set up your Google Analytic Account.
For starting, you got to the following link: Google Analytics | Google for Developers and log in with your Gmail account. In that home page you have to click the button Start Measuring.
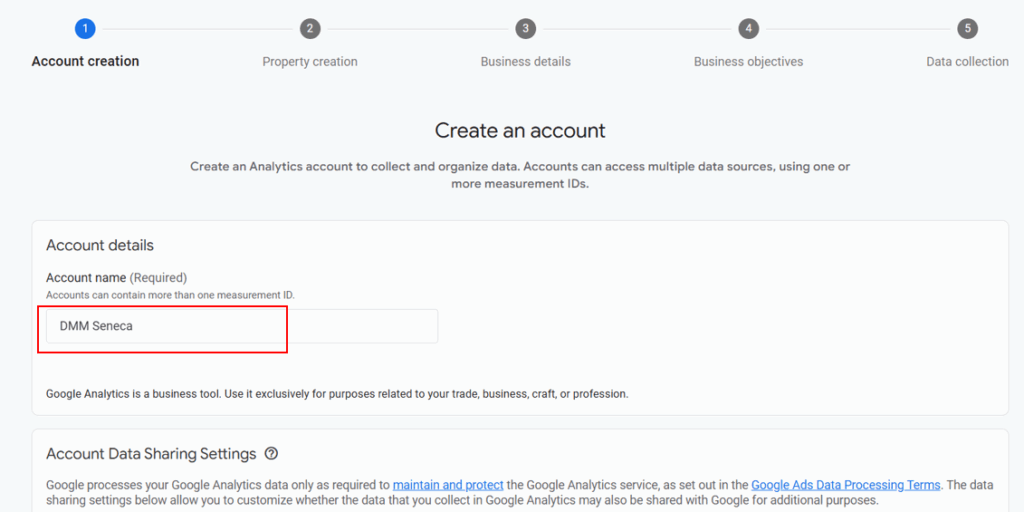
Then you will be asked to provide and account name. No worries, this is an internal name just for you, so you can use any name there.
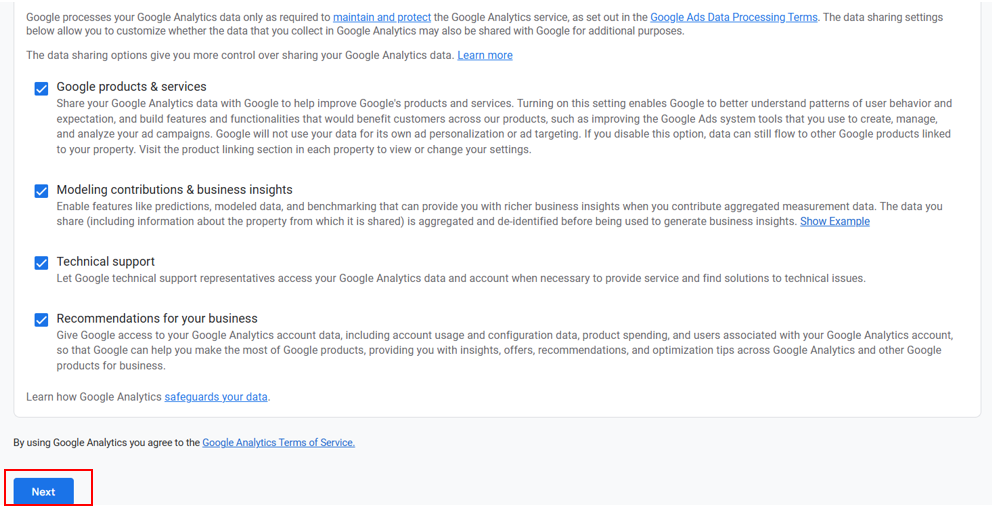
Scrolling down, you’ll be able to find the settings for giving control to Google Analytics Data. The most common option is to keep the default settings. After selecting, please press Next.
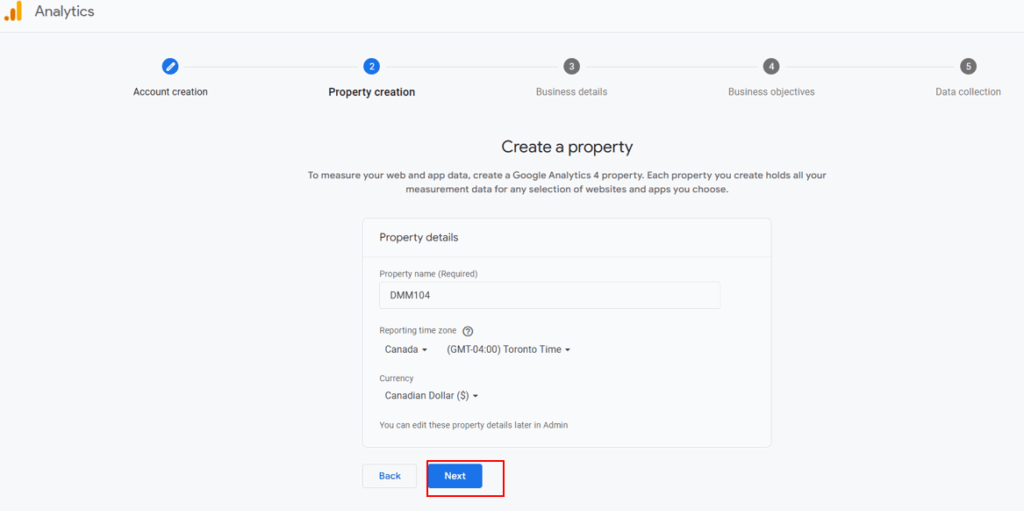
After this, you will need to create a property name and select the time zone, currency and country you are in. A property is the webpage you want to track.
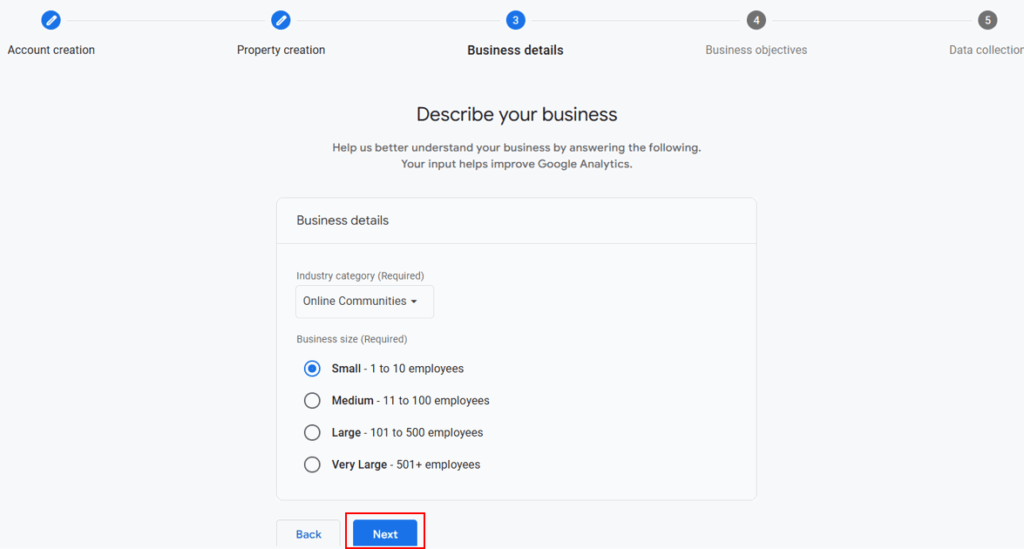
After clicking Next, Google will need you to describe your business. That mean selecting the industry your webpage belong to, and the size.
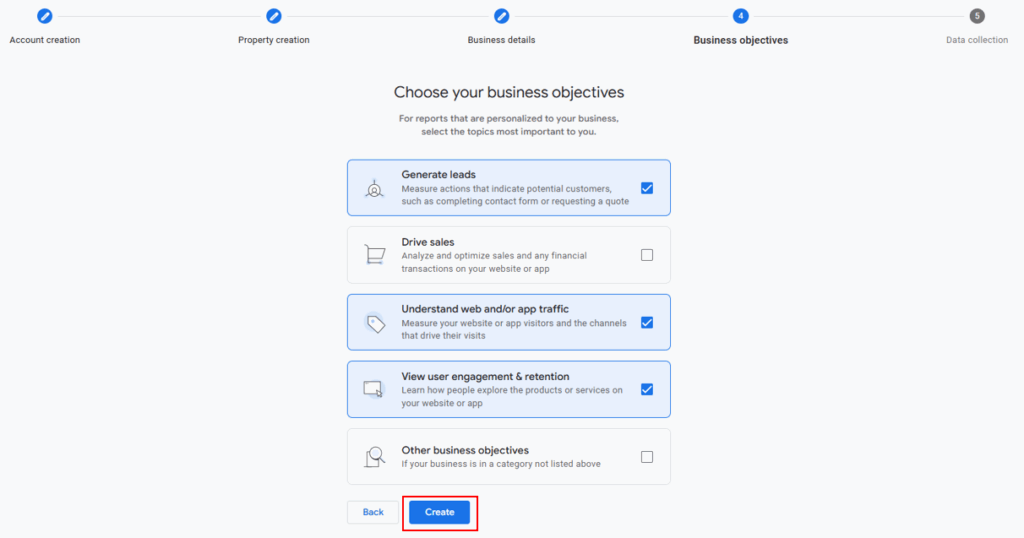
Followed by describing your business, you will need to select your business objective. This will allow to have more personalize reports based on your objectives.
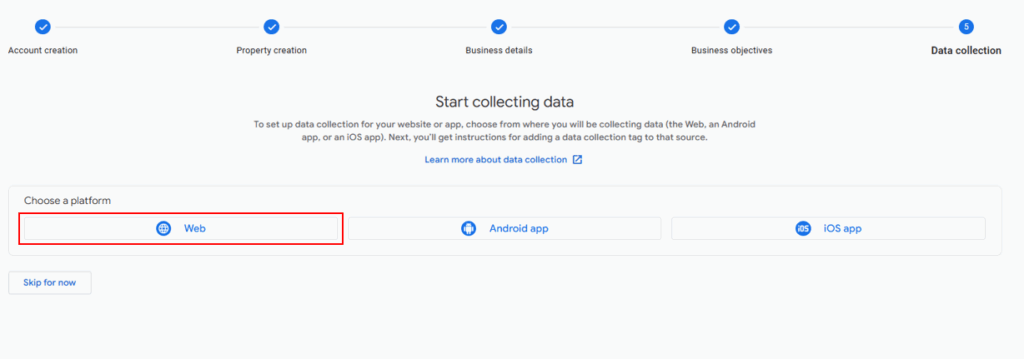
Later, Google Analytics will ask you to choose the platform form where you want to start collecting the data. In this case, WordPress that is a website.
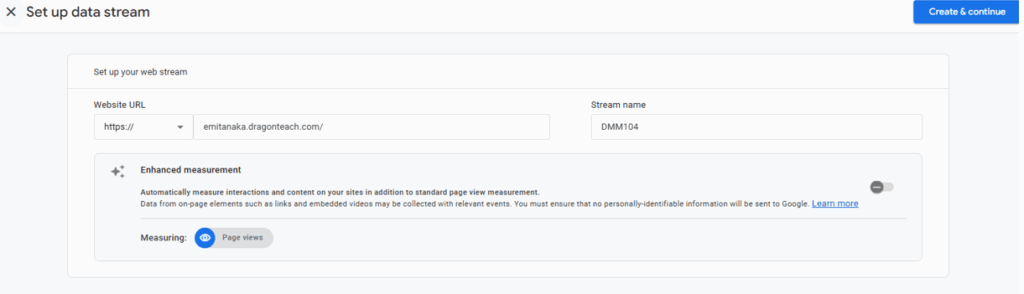
Then you will need to set up the stream data by adding the URL of the webpage and giving it a name. If you are planning to use the MonsterInsight plugin please turn off the enhanced measurement to have a more accurate data. For continue, please press Create & Continue button.
Once done this, you will need to set up the MonsterInsight plugin.
2. Setting up the MonsterInsight Plugin.
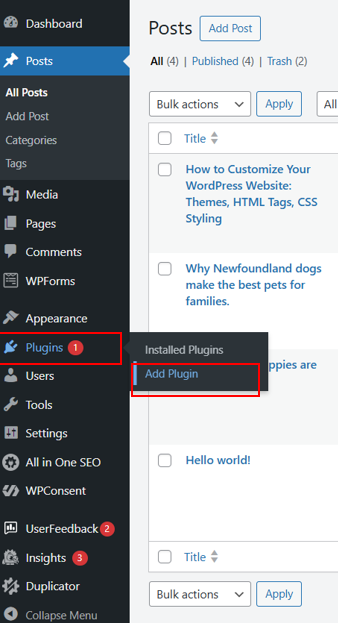
1. Add Plugins
The first step is to add the MonsterInsight plugin. You can do this by going to the WordPress menu and click on Plugins and add Plugins button.
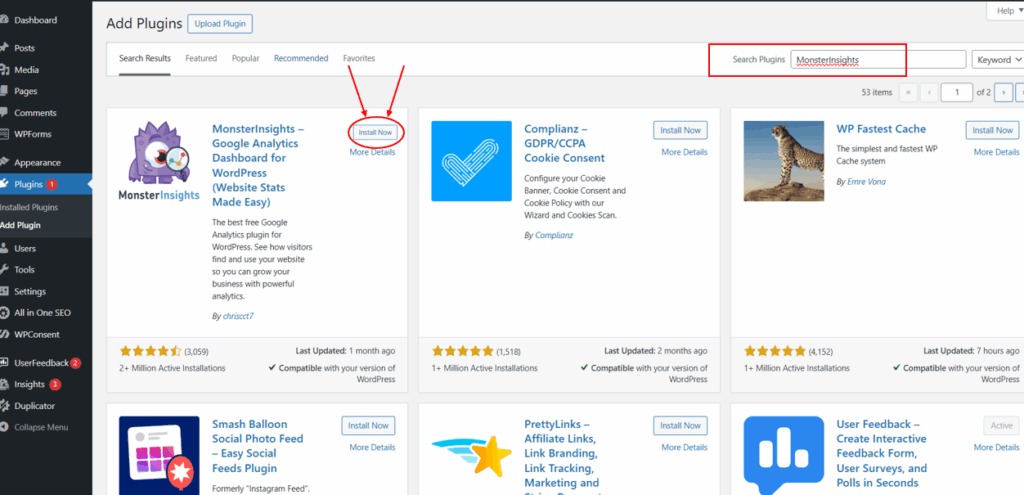
2. Add the MonsterInsights Plugin
Then on the search menu bar type MonsterInsights and once you find it press the Install now button. Then press Active button to start using the plugin to connect to Google Analytics.
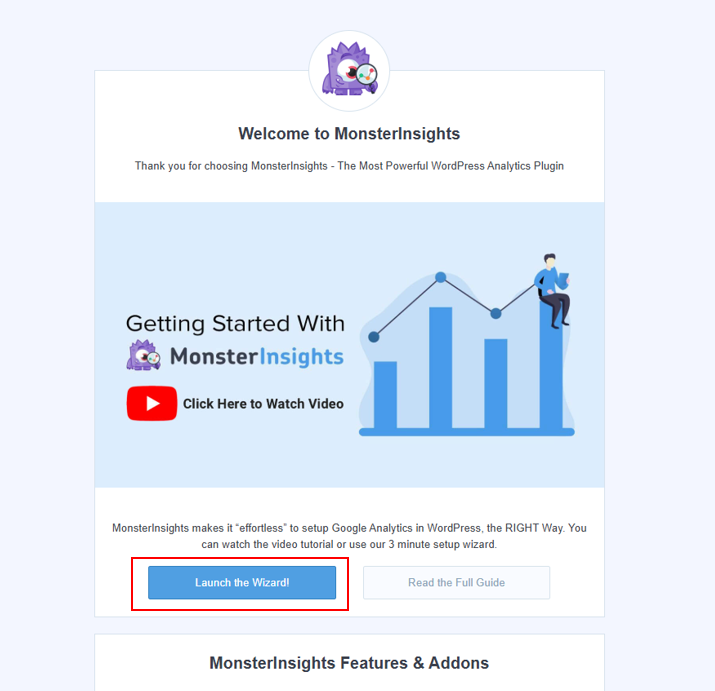
After Activating it, it will open a page where you can watch a video to getting started. It’s a brief important introduction of MonsterInsights. For continuing, you have to press the Launch the Wizard button.
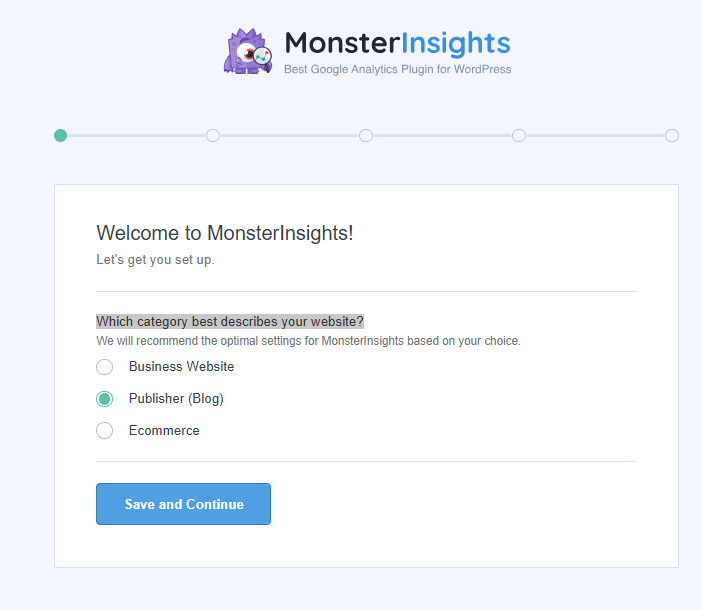
3. Select the best category that describes your website
Then you have to decide between three categories that best describe your website. For this exercise I will choose Publisher. After selecting, continue and press the button Save and Continue.
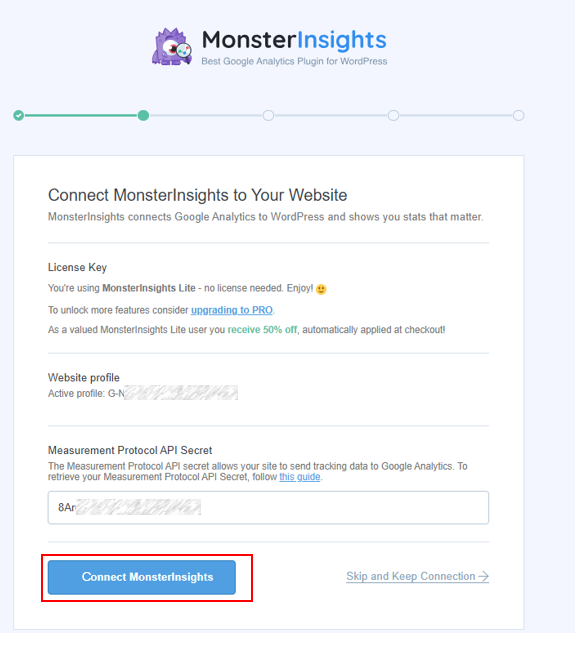
4. Connect MonsterInsights to Your Website
A new window will show up. This indicates your you won’t need a license key because you are using the lite version, which is free. However, if you need the PRO version, you can upgrade it by a price. You can also find your profile code that start with a G-. This code is important because is the one that will connect and will be the key for the Google Analytics connection. After reading this window information, please press Connect to MonsterInsights to continue.
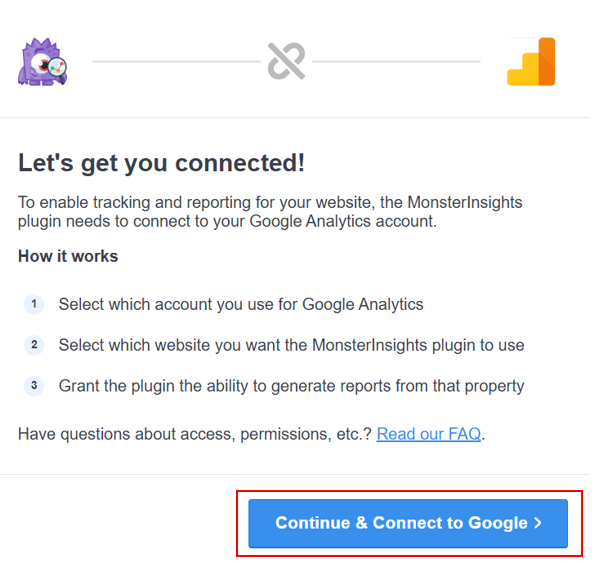
Then this will lead to another windows where it will tell you the next steps. For continue you need to press the Continue and Connect to Google button.
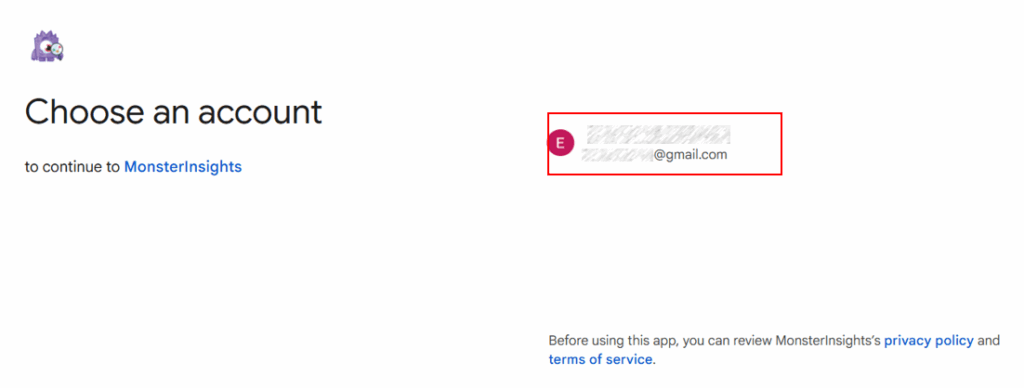
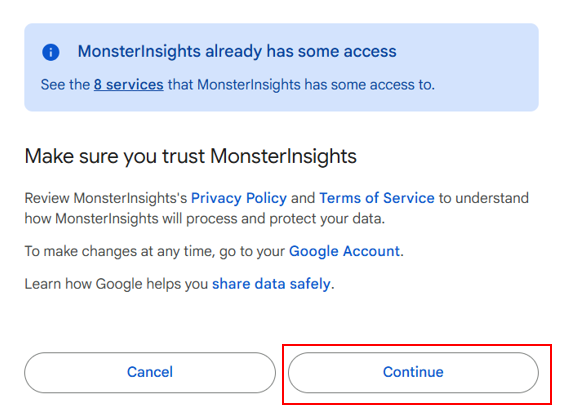
As mentioned before, you will need a Google Analytics account. If you don’t have it, please create it. If you do, please select that account and login. After this, you’ll need to review Privacy Policy and Terms of Service to understand how MonsterInsights will process and protect your data and if you agree please press the continue button.
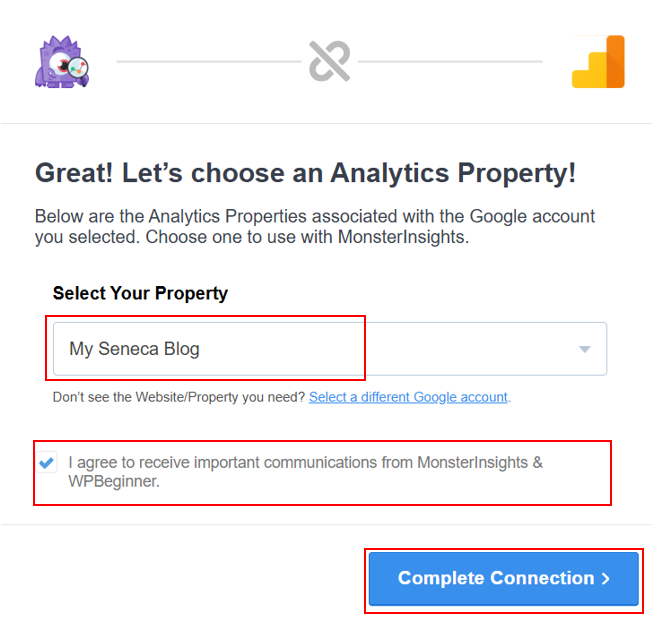
Then you need to choose your analytic property. You will need to type the name of your property and check the box if you agree to receive important communications, if you don’t, you don’t need to check it. Then press complete connection to continue.
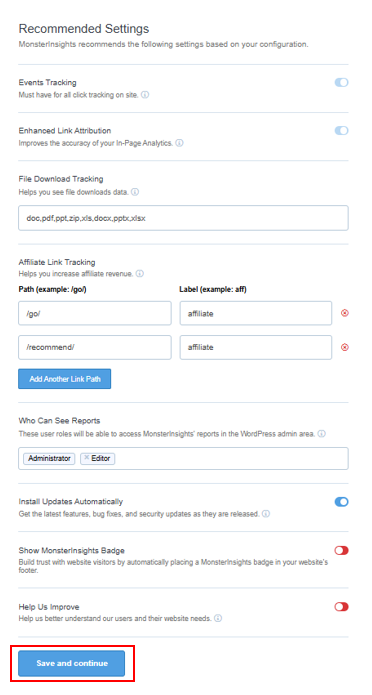
Then you will need to check the recommended settings and adjust according to your preferences and press Save and Continue button. Please consider there is Show MonsterInsights Badge that is an option that will add at the end plugin logo, you can decide if you want to include it or not.
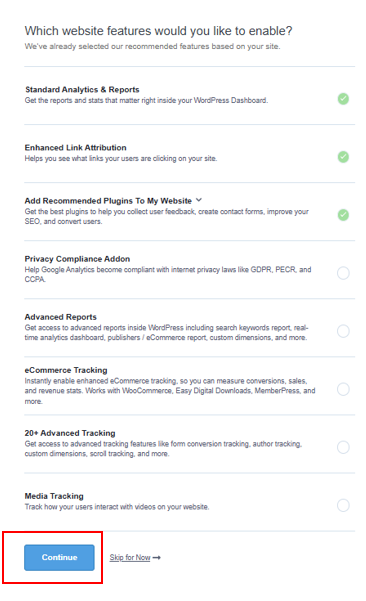
Then you would need to confirm the website features you would you like to enable, and press continue. Or if you prefer you can skip for now.
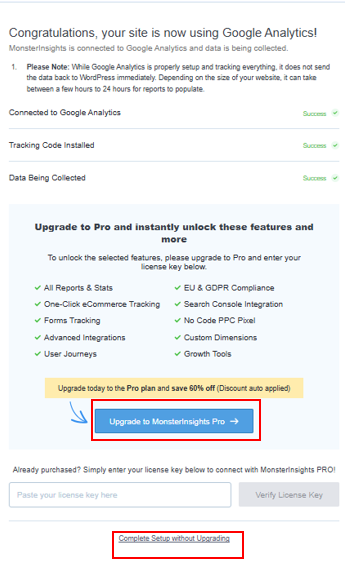
As a last step it will ask you if you want to upgrade to the PRO version. If you do you can press the button upgrade, but if you don’t just press the Complete setup without upgrading.
Finally, once connected in your WordPress you will be able to see a dashboard like this:
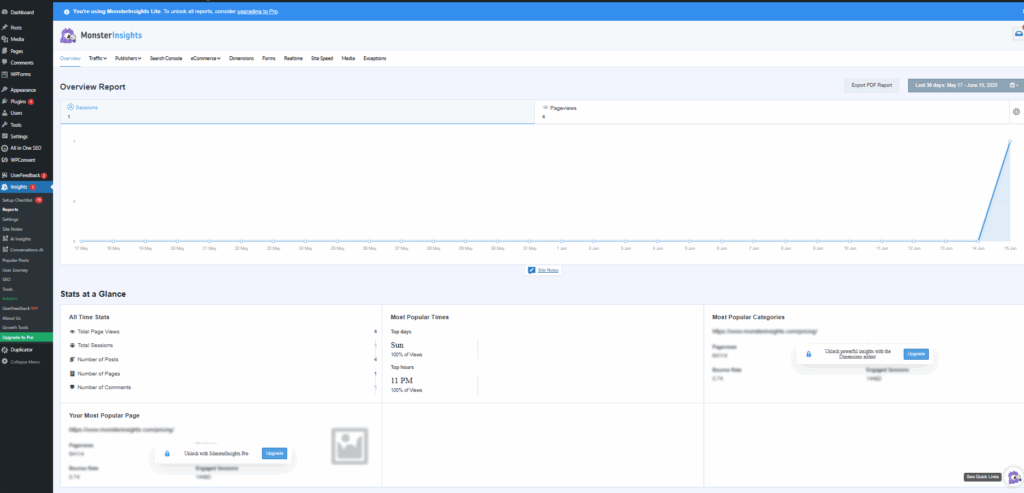
As mentioned earlier, the G- code is the key that allows WordPress connects with Google Analytics. When we used MonsterInsight it connected to Google Analytics and automatically added the tracking code to the website, so there is no need to do it manually or insert it.
Conclusion
Understanding the basic for customizing WordPress is not as hard as it seems. With just a few steps, you can change the theme, uses HTML to structure your content and apply CSS to customize the colours and style. Additionally, you can set up Google Analytics to track important KPIs. All this can help your website to look better and perform more successfully.